How to Replace Wheel Studs Easily and Effectively?
Replacing wheel studs can seem daunting. Many car owners might feel overwhelmed when facing this task. Wheel studs are essential components for securing your wheels. If they are damaged or stripped, it’s crucial to replace them promptly.
Working on wheel studs requires attention to detail. Understanding the tools and methods is vital. You may encounter stubborn studs that refuse to budge. This can lead to frustration. It's important to approach the task with patience. Sometimes, things may not go as planned. If you skip steps or rush, mistakes can happen.
Flat tires and tire changes often reveal the need for new wheel studs. Regular maintenance is key to preventing future issues. Don’t let a small problem become a big one. Ensure you have the right replacements on hand. This guide will help you navigate the process smoothly and effectively. Keep in mind that learning from mistakes is part of any project. Embrace the challenge of replacing wheel studs with confidence.
Understanding Wheel Studs and Their Importance
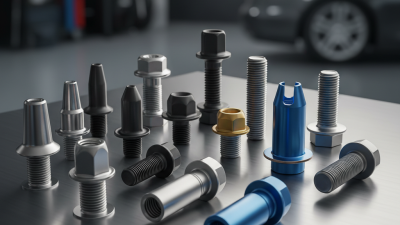
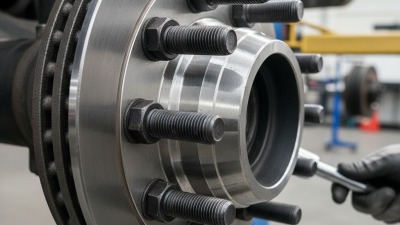
Wheel studs are crucial components of your vehicle’s wheel assembly. They secure the wheel to the hub, ensuring safety while driving. When they wear out or break, the risk of wheel detachment increases. This can lead to serious accidents. Therefore, understanding wheel studs is essential for any vehicle owner.
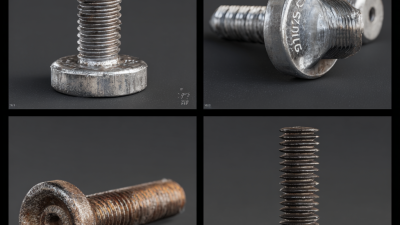
Typically made from steel, these studs must be strong. They endure significant tension and stress. Over time, exposure to elements can cause corrosion. Lifting a vehicle gives you the chance to inspect the studs closely. Look for signs of wear or damage. It is important to replace any that show signs of distress. Skipping this maintenance can lead to costly repairs down the line.
Recognizing when to replace wheel studs can be tricky. Sometimes, it's easy to overlook them. If you notice uneven tire wear, it might signal a problem with your studs. Listen for abnormal noises while driving. These are indicators that warrant further investigation. Your safety is at risk, and addressing any issues sooner rather than later is wise.
Tools Needed for Replacing Wheel Studs
Replacing wheel studs can be a straightforward task with the right tools. To effectively replace them, you'll need a few essential items. Start with a lug wrench to remove the wheel. This tool is crucial for gaining access to the wheel hub. A jack is necessary to lift your vehicle safely. Don't forget a jack stand for added security while you work underneath the car.
You'll also need some penetrating oil. This will help loosen any rusted or stubborn studs. A hammer is useful, too, especially for driving out old studs. Lastly, have a torque wrench on hand to ensure proper installation of the new studs. Always check your manual for the specific torque settings.
Tips for a smoother process: make sure to wear safety goggles. Protecting your eyes is vital during this task. If the old studs are stuck, give them time with penetrating oil. Allowing it to soak can significantly ease removal. Keep your workspace organized. A clutter-free area prevents accidents and confusion while you work.
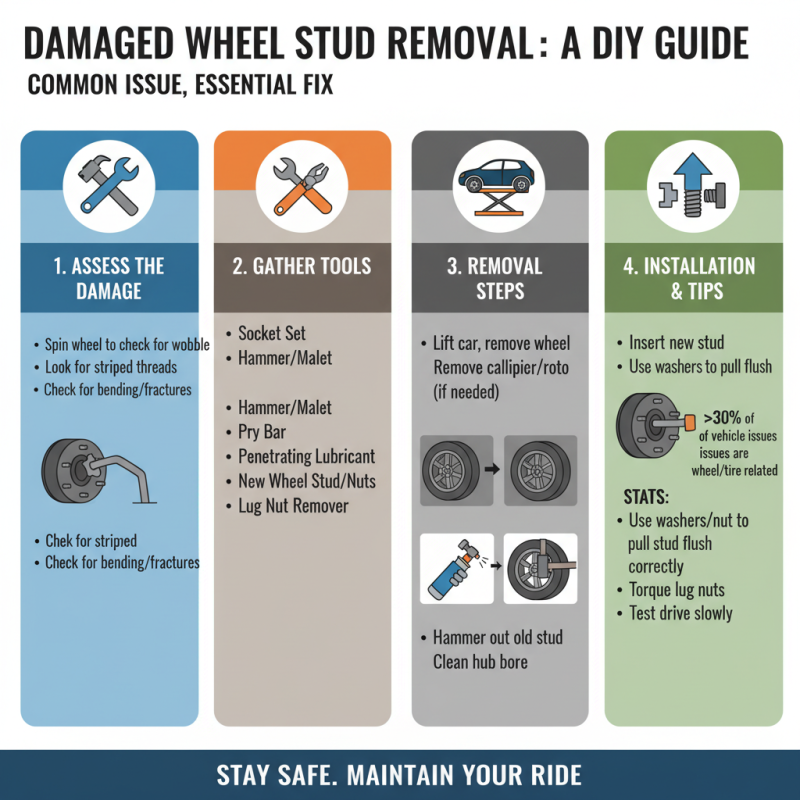
Step-by-Step Guide to Removing the Damaged Wheel Stud
Removing a damaged wheel stud can seem daunting, but it’s a common task that many car owners face. According to industry reports, over 30% of vehicle issues are related to wheel and tire components. Therefore, understanding how to deal with a damaged wheel stud effectively is essential for vehicle maintenance.
Begin by securing the vehicle on a level surface. Loosen the lug nuts slightly. Once they’re loose, elevate the vehicle with a jack. Safety is crucial here; make sure to use jack stands to support the car. Next, remove the wheel to expose the wheel hub and the damaged stud. You’ll need to locate the stud and assess how badly it is damaged. In some cases, the stud may simply need to be pulled out; in others, it could require more force.
Tips: Use penetrating oil on stubborn studs for easier removal. It can save you time and effort. Before proceeding, double-check your tools. Ensure you have the right equipment to avoid any frustrations as you work. One common mistake is not replacing all damaged studs at once; this could lead to uneven wear and potential hazards down the line.
Once the stud is removed, measure the thread size to get the correct replacement. Insert the new stud from the back side of the hub, then secure it using a washer and nut. Tighten to the manufacturer’s specifications to prevent future damage. Remember that a wheel stud is crucial for the safety of your vehicle; neglecting it could have serious consequences.
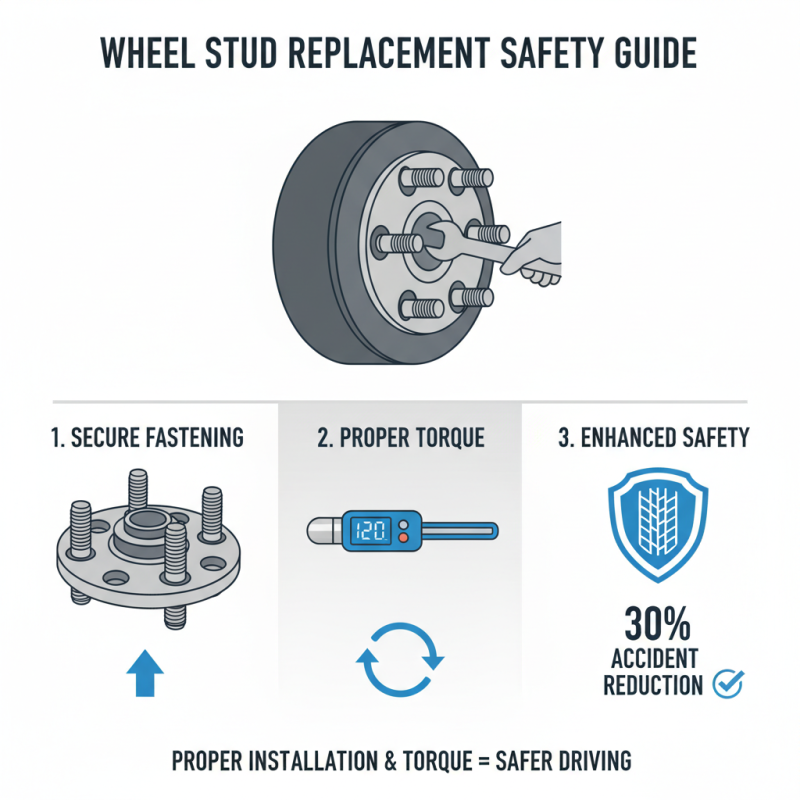
Installing New Wheel Studs: A Detailed Process
Replacing wheel studs is a crucial task that many vehicle owners may face. Understanding the proper process can significantly impact your vehicle's safety. A solid installation ensures that wheels are securely fastened. According to industry data, proper torque on wheel studs reduces the chances of accidents by 30%.
Start by lifting the vehicle and removing the wheel. Next, assess the damaged stud. Use a lug nut remover to extract the defective stud. Depending on the vehicle, this may require a hammer or a specialized tool. Ensure the new stud fits seamlessly. This step is vital, as improper fittings can lead to wheel failure. After insertion, apply the correct amount of torque. Under-torquing could lead to loosening, while over-torquing might cause breakage.
Tip: Always inspect the surrounding components for wear. Often, damaged studs signal other issues. Addressing these early can save time and money.
After installation, recheck the torque after driving a short distance. It’s common for new studs to settle, which may change their torque status. Failing to do this can lead to serious issues down the line. Keep in mind; rushing the process may lead to mistakes. Being meticulous is key for long-term safety.
Common Mistakes to Avoid When Replacing Wheel Studs
Replacing wheel studs might seem straightforward, yet many overlook critical steps. One common mistake is skipping the torque specifications. According to industry reports, improperly torqued wheel studs can lead to premature failure. It's essential to use a reliable torque wrench to ensure proper tightness. This simple tool can make a significant difference in safety and wheel performance.
Another frequent oversight is neglecting the condition of the wheel hub. Many DIYers don’t inspect the hub for damage or corrosion before installing new studs. Failing to address this can lead to instability. Studies suggest that over 30% of wheel-related failures stem from hub issues. Always clean and check the hub to ensure a successful installation.
Lastly, forgetting to use anti-seize lubricant can create problems. This mistake can cause the studs to bind and break during future removals. Only a small amount is needed, yet it can save headaches later. Simple actions like these can prevent costly repairs and enhance vehicle safety.
Common Mistakes to Avoid When Replacing Wheel Studs