Choosing the right Sprocket Bolt is a small decision with serious mechanical consequences. A loose fastener can create chain misalignment, uneven tooth wear, and sudden drivetrain noise. The wrong grade may fail under repeated shock loads. That failure often begins quietly.
Dr. John H. Bickford, a recognized authority on bolted-joint design, explains, “A bolt is not simply a pin; it is a spring that creates clamping force.” This principle matters when selecting a Sprocket Bolt for motorcycles, conveyors, agricultural equipment, or industrial drives. The bolt must maintain tension while facing vibration, torque changes, dirt, moisture, and temperature swings.
This guide examines the details that are easy to overlook. Thread diameter matters. So does thread pitch. Material strength, proof load, head style, shank length, and corrosion protection also influence performance. A high-strength bolt is not automatically the best choice. Excessive tightening can distort the sprocket or damage its mounting surface.
Measure carefully.
Inspect the mating parts first. A worn flange can make a new bolt seem ineffective. Torque values should follow the equipment manufacturer’s instructions, not guesswork. In real maintenance work, assumptions cause expensive mistakes. Even experienced technicians sometimes replace bolts without checking thread engagement or washer condition.
The right Sprocket Bolt creates a stable joint, protects alignment, and supports longer service life. It is a modest component, but its role deserves precision.

Understanding sprocket bolt types helps prevent loose fasteners, chain misalignment, and premature wear.
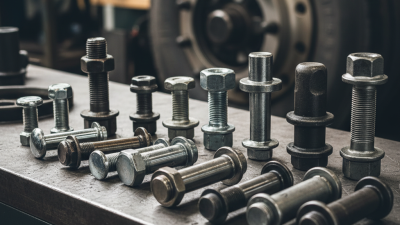
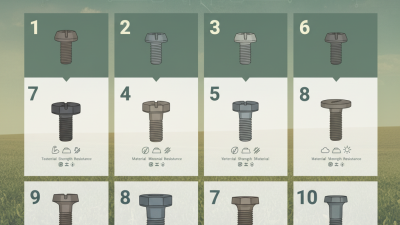
Standard hex-head bolts suit many general chain-drive assemblies. Flange-head bolts spread pressure across the sprocket face. They work well where washers may shift or space is limited.
Countersunk bolts sit flush with the sprocket surface. This design helps protect the chain from contact damage.
High-strength bolts are useful for heavy loads, frequent starts, and vibrating equipment. Locking bolts or mechanical locking methods can improve security in demanding applications. Select the correct diameter, thread pitch, grip length, and strength grade. The bolt should clamp the sprocket firmly without bottoming inside the threaded hole. A bolt that fits is not always suitable. Thread engagement still matters.
Tips: Check the original bolt before purchasing replacements. Measure the unthreaded shank, not only the overall length. Clean dirt from the mounting face and inspect cracks around each hole. Tighten bolts in a cross pattern when possible. Use the specified torque from the equipment manual. Too little torque allows movement; too much can distort the sprocket. In field maintenance, damaged threads are often overlooked. I have found that a perfect-looking bolt can hide stretched threads after repeated tightening. Replace questionable hardware rather than relying on appearance. Also, review the setup after the first operating period, because early movement may reveal an incorrect bolt choice.
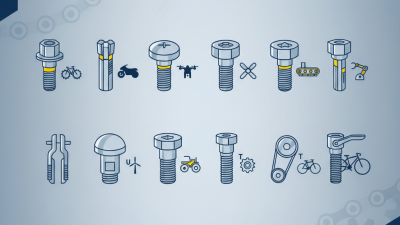
The correct sprocket bolt begins with three measurements: diameter, thread pitch, and usable length. Do not guess from the head size. Measure the threaded hole with a caliper, then confirm the pitch using a thread gauge. Metric and imperial threads can look nearly identical, yet they are not interchangeable. A damaged old bolt may also give a misleading measurement.
Check the sprocket’s mounting design carefully. Some assemblies require a plain bolt, while others use a shoulder or flange. The threaded section must engage fully without bottoming inside the hole. For steel components, engineering guidance often targets thread engagement near one bolt diameter, but the equipment manual remains the controlling reference. Too little engagement can strip threads. Too much can block proper clamping.
I once replaced a worn bolt by matching its length alone. It fitted, but the shoulder prevented the sprocket from seating flat. That mistake was avoidable.
Inspect the bolt grade, washer type, and nut condition before installation. Sprockets experience repeated shock loads, so tightening torque matters. Use the specified value whenever available, and tighten in a cross pattern when several bolts secure one sprocket. Check for damaged threads, burrs, and visible gaps after assembly. Small errors matter. Recheck the fasteners after the first operating cycle, especially where vibration or load changes are common.
Choosing a sprocket bolt starts with load, not appearance. Chain tension creates repeated shear, vibration, and bending at the joint. ISO 898-1 class 8.8 bolts provide at least 800 MPa tensile strength and 640 MPa yield strength. These values help engineers estimate preload and fatigue resistance. However, strength alone does not guarantee service life. Thread fit, washer hardness, and tightening accuracy also matter. A high-grade bolt can fail when installed against a soft or damaged flange.
Corrosion deserves equal attention. The NACE IMPACT study estimated global corrosion costs at about 2.5 trillion US dollars, or 3.4% of global GDP. In wet, salty, or chemical areas, plain carbon steel may rust beneath the washer first. Zinc-coated fasteners can work in moderate exposure, while stainless steel grades with molybdenum resist chloride attack more effectively. Check galvanic compatibility between the bolt and sprocket. Small contact areas can accelerate damage. Salt-spray results from ISO 9227 are useful for comparison, but they do not predict exact field life.
I inspect threads before assembly. Look for red rust, galling, stretched threads, and polishing around the washer. Use the specified torque, because coatings and lubricants change friction. Torque alone is imperfect. Preload measurement is better when critical equipment justifies it. The convenient bolt is not always the correct bolt. I have learned that corrosion hidden under a washer deserves more attention than surface shine.
Choosing the right sprocket bolt starts with fitment, not appearance. Match the bolt diameter, thread pitch, thread length, and shoulder design to the sprocket carrier. A bolt that is too long may contact internal parts. A short bolt may engage too few threads. Check the fastener grade against the vehicle service manual. SAE J429 identifies Grade 8 fasteners with a minimum tensile strength of 150 ksi, but higher strength alone does not guarantee correct fitment.
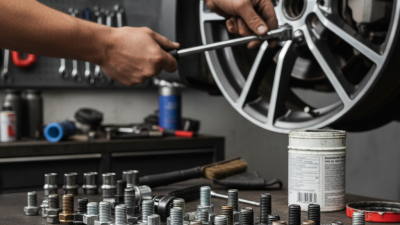
Torque needs careful control. Use the specified value for the exact bolt, nut, and installation condition. Dry threads and lubricated threads can produce different clamping forces at the same wrench setting. The NASA Fastener Design Manual notes that torque-based preload can vary by roughly ±25% or more when friction changes. That difference matters on a rotating assembly. Use a calibrated torque wrench, clean the threads, and avoid impact tools for final tightening. Tighten in a crisscross pattern when the design allows it.
Tips: Inspect the sprocket seat, bolt holes, and nut faces under bright light. Look for burrs, oval holes, damaged threads, or uneven contact. Install washers only when specified. Some locking methods alter torque readings. Mark the fastener after tightening, then check for movement after the first operating cycle. I have seen careful installers miss a small spacer, so measure the full stack height before final assembly. Do not rely on memory. Record the bolt grade, torque value, and thread condition. (Sources: SAE J429; NASA Fastener Design Manual; ISO 898-1)
| Inspection Dimension | Recommended Requirement | Practical Fitment or Installation Check | Reference Data |
|---|---|---|---|
| Thread system | Use the same thread standard as the sprocket carrier or hub. | Confirm whether the assembly uses metric or Unified National Coarse (UNC) threads. Never force a bolt with a different pitch. | Common metric examples: M8 × 1.25, M10 × 1.5, M12 × 1.75. Common inch examples: 5/16-18, 3/8-16, 1/2-13 UNC. |
| Nominal diameter | Match the original bolt diameter or the engineered hole specification. | Measure the threaded shank with a caliper and inspect the sprocket and carrier holes for elongation or damage. | The bolt must provide full bearing contact without excessive clearance in the sprocket hole. |
| Bolt length | Select a length that provides adequate thread engagement without bottoming out. | After tightening, the bolt must not contact the bottom of a blind hole, interfere with moving parts, or project into a chain path. | For steel female threads, a practical minimum engagement is approximately 1.0 × bolt diameter; longer engagement may be required in softer materials. |
| Strength class | Use a high-strength fastener suitable for cyclic drive loads. | Verify the head marking and replace stretched, corroded, rounded, or previously damaged bolts. | Typical metric choices are property class 10.9 or 12.9. Typical inch equivalent applications use SAE Grade 8 or an engineered equivalent. |
| Head and washer fit | Use a head and washer arrangement that fully supports the sprocket mounting face. | Check that the head or washer does not foul the chain, carrier, brake components, or adjacent structure. | Use hardened washers where specified; do not substitute split-lock washers for a designed washer or locking system without engineering approval. |
| Seating surfaces | All contact surfaces must be clean, flat, and free from burrs. | Remove dirt, paint flakes, rust, and raised metal. Inspect the sprocket for cracks and confirm that it sits flush against the carrier. | A clean, dry seating surface improves torque consistency and clamping-force accuracy. |
| Thread condition | Threads must be clean and undamaged before assembly. | Run the nut or bolt by hand for several turns. It should start smoothly without cross-threading or binding. | Do not use a torque wrench to overcome damaged or contaminated threads. |
| Torque basis | Use the vehicle, equipment, or sprocket manufacturer’s specified torque whenever available. | Confirm whether the specification is for dry, oiled, or thread-locker-coated threads before tightening. | The values below are general dry-thread reference values, not a replacement for an application-specific specification. |
| Approximate Dry-Thread Torque References for Metric High-Strength Bolts | |||
| M8 × 1.25 | Use the value matching the marked property class. | Tighten gradually and verify that the sprocket remains fully seated. | Class 10.9: approximately 36 N·m (27 lb·ft); Class 12.9: approximately 44 N·m (32 lb·ft). |
| M10 × 1.5 | Use the value matching the marked property class. | Check clearance around the bolt head and confirm that the wrench is calibrated. | Class 10.9: approximately 69 N·m (51 lb·ft); Class 12.9: approximately 83 N·m (61 lb·ft). |
| M12 × 1.75 | Use the value matching the marked property class. | Confirm that the hub or carrier can safely accept the required clamp load. | Class 10.9: approximately 120 N·m (89 lb·ft); Class 12.9: approximately 145 N·m (107 lb·ft). |
| Tightening sequence | Tighten in a diagonal or star pattern. | Use at least two passes, for example approximately 50% of final torque followed by 100% of final torque. | A cross-pattern reduces the risk of sprocket distortion and uneven clamping. |
| Thread-locking method | Use the specified locking method for the application. | If liquid threadlocker is used, clean and dry the threads and follow the product’s cure time and torque instructions. | Threadlocker changes friction and may change the required torque; do not apply it over oil or grease unless specifically permitted. |
| Final inspection | Confirm secure assembly and free chain movement. | Check bolt-head clearance, sprocket runout, chain alignment, and correct chain tension before operation. | Reinspect after the first operating cycle and at the normal maintenance interval. |
Safety note: Torque values are approximate dry-thread references based on common high-strength metric fasteners. Always give priority to the equipment manufacturer’s service specification, the bolt manufacturer’s instructions, and the actual thread, lubrication, washer, and joint conditions.
How to Choose the Right Sprocket Bolt?
Inspecting Sprocket Bolts for Wear and Replacement Needs
A sprocket bolt can look usable while hiding serious fatigue. Clean the sprocket area before inspection, because packed grease can conceal cracks and damaged threads. Check the bolt head for rounded edges, deep scratches, and impact marks. Inspect the shank for bending, necking, or shiny wear lines. These marks often show movement between the sprocket and hub.
Look closely. Measure, do not guess.
Compare the bolt length and diameter with the equipment service manual. A stretched bolt may appear normal but measure slightly longer than an unused bolt. Examine the threads with a gauge or a matching nut. The nut should turn smoothly by hand, without binding or excessive looseness. Replace bolts with corrosion pits, thread damage, visible cracks, or permanent distortion. Do not reuse a bolt after severe over-tightening unless the service guidance specifically permits it.
I once treated light rust as harmless and focused only on torque. That was a poor inspection habit. Rust around the washer seat can reduce clamping force and allow repeated movement. Check the washer, mounting hole, and sprocket contact surface as well. If the hole is oval, replacing the bolt alone will not correct the problem. Install the correct grade and length, then tighten it with a calibrated torque wrench. Recheck the assembly after initial operation, because settling can change the clamp load.
Bolt property classes indicate minimum nominal tensile strength according to ISO 898-1. Higher-strength bolts are not automatically suitable for every sprocket assembly, so the specified size, grade, thread engagement, washer arrangement, and tightening torque must always be verified for the application.
Replace a sprocket bolt when threads are stripped, stretched, heavily corroded, cracked, bent, or damaged by repeated loosening. Check the matching nut and sprocket holes as well, because damaged mating parts can prevent the correct clamping force even when the bolt appears serviceable.